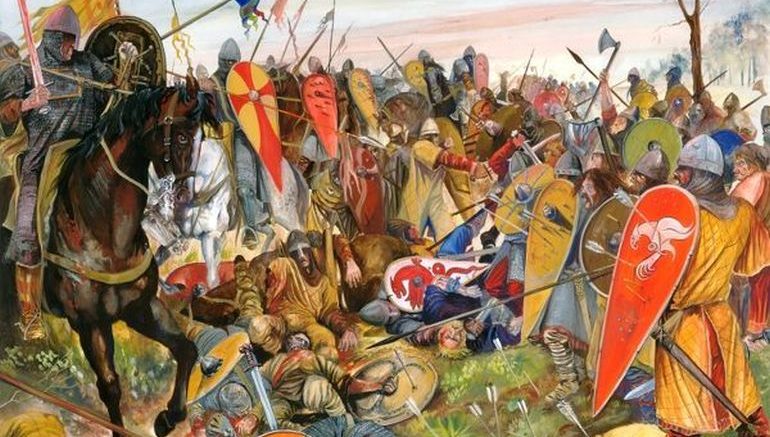
The Battle of Hastings fought on 14 October 1066, proved to be a pivotal event in the long run – with medieval continental Europeans gaining their foothold in the political affairs of the British islanders. And while the battle in itself was not as decisive as one would be inclined to think (English resistance continued till 1070 AD), the encounter was surely hard fought with the Normans just about managing to clinch their victory from the jaws of defeat. To that end, in view of this historically interesting (and rather notable) episode, let us take a gander at the armies and tactics of the Battle of Hastings.
Contents
The Opposing Armies at the Battle of Hastings
The ‘Profusion’ of Norman Knights
In the 11th century AD Europe, the role of the knight extended far beyond the battlefield and ranged into seemingly mundane avenues like petty judges, political advisers to even glorified farmers. During these transformative years, fiefs were introduced as alternatives to tenures for the heavily armed horsemen, while the length of service rarely went beyond 40 days a year.
As for the typical Norman military system, most of the lords rather hosted their own household knights within large halls (at their own expense). There were also wealthier knights who while settling inside the lord’s estate, kept to their separate holdings. Some of them were even expected to bring their own followers to serve as infantry or lightly-armed cavalry.
In essence, the statuses and roles pertaining to knighthood in the 11th century AD Normandy were not defined by stringent requirements (like in later centuries), except for their ‘noble’ births. And while the hierarchy system of feudalism was beginning to extend its roots during the epoch, the majority of the lords actually kept more knights than their dukes would need during times of wars and crisis. This political scope rather alludes to a decentralized state of affairs, with various power centers stretched across the Norman realm, nominally headed by the duke.
The Various Troop Types in the Norman Camp
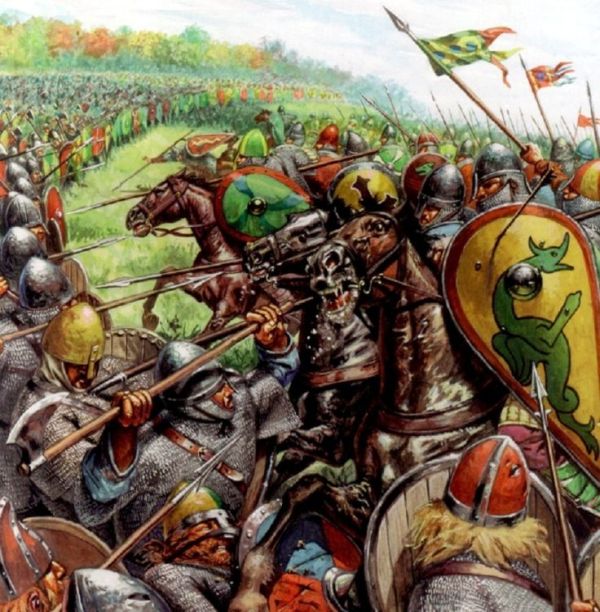
While popular culture portrays the Battle of Hastings as a momentous encounter between the ‘English’ Anglo-Saxons and the continental Normans, in reality, the conflict brought forth other nationalities into the fray.
For example, on the Norman side, the left wing of Duke William’s army was largely composed of Bretons, who interestingly traced their lineage from the ancient Brittonic speakers of southwestern Britain, while combining elements of both Gauls and Viking raiders.
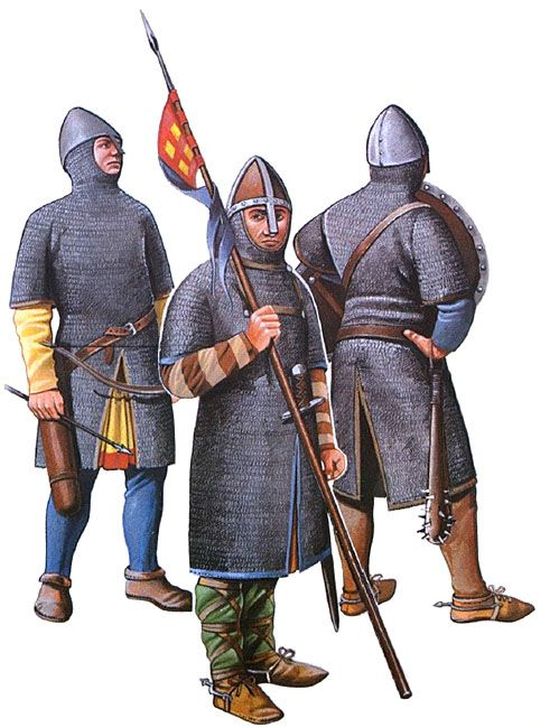
Likewise, the right wing of the Normans was composed of Franco-Flemish troops. Another overlooked point in the case of the Norman invasion force was how it also included large numbers of infantry troops and mercenaries, including spearmen, archers, and even crossbowmen.
Pertaining to the latter, literary works like Carmen de Hastingae Proelio (Song of the Battle of Hastings), attributed to the Bishop Guy of Amiens, and often viewed as the earliest known source of the battle, clearly mention bolts with square-shaped heads.
And if the crossbow seems ‘exotic’ to the scope of Hastings, historians have also painted the possibility of slingers being used by William. Typically used as screening troops, these men could have still unleashed their lethal volleys, especially on armored targets at an effective range of around 30 m (around 100 ft).
The ‘Viking’ Legacy of the Normans
In terms of history, complemented by some semi-legendary anecdotes, Rollo was a Viking chieftain (his name being probably derived from Ganger Hrólf) who commanded a large band of followers and operated in the Seine valley with their usual bouts of raiding and plundering.
Afflicted by such military actions, Charles III (also called ‘the Simple’) – the King of West Franks, invited Rollo and his followers to settle on the eastern side of Normandy (Upper Normandy) in 911 AD, in return for nominal allegiance and possibly Rollo’s conversion to Christianity.
And so by the time the first ‘batch’ of Vikings settled in the land, the rich French territory previously known as Neustria was rechristened as ‘Normandy’, derived from the Latin Nortmanni – denoting the Northmen (or Norsemen) raiders.
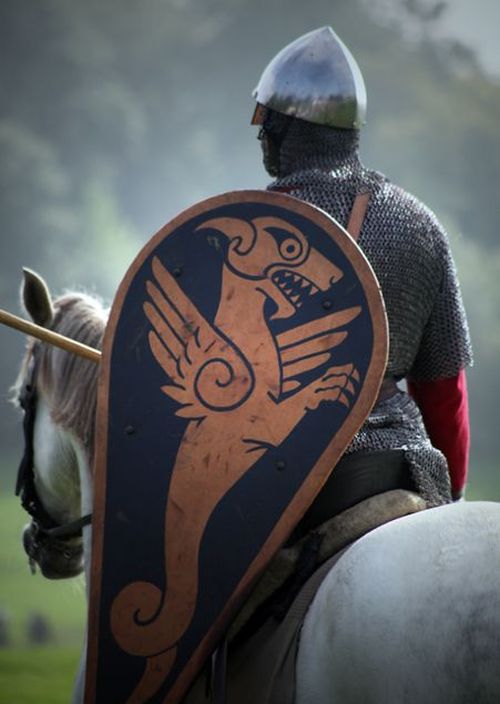
In the 11th century, the Normans, while replicating the customs, religion, and feudal tendencies of their continental brethren, still cultivated the war-like tendencies and military resourcefulness of their Viking forefathers. Part of their ‘northern’ lineage also saw its expression in the form of flags and banners at the Battle of Hastings.
For example, the Bayeux Tapestry depicts a particular flag with a raven, which was earlier thought to be a chalice representing the holy papal banner. Furthermore, in 10th-11th century medieval Normandy, the preferred battle cry was ‘Thor aid!‘ rather than ‘Dex Aie!‘ (God’s Aid).
The Norman Numbers
While the Battle of Hastings is a relatively well-documented event that shaped the future of the British Isles in medieval times, the chroniclers of history were vague in their assessment of the actual numbers involved in the encounter; their notions were often skewed by tales of exaggeration.
Even the Norman poet Wace, whose accounts are often comprehended as more appropriate in terms of practicality, talked about how the Normans left for the shores of England in 696 ships. But considering the scope of Norman logistics, which was rather complex with the influence of the Eastern Romans (Byzantine), some of these ships surely would have carried provisions and animals, instead of troops.
However, unlike many famous battles in history, the battlefield at Hastings has been identified (though recent research has put forth the conjecture that the very battlefield was on Caldbec Hill, a mile from the forest edge). Historians have gauged the feasible area of the field that was probably used during the encounter, while also making an educated guess of the formations and tactics used in the battle.
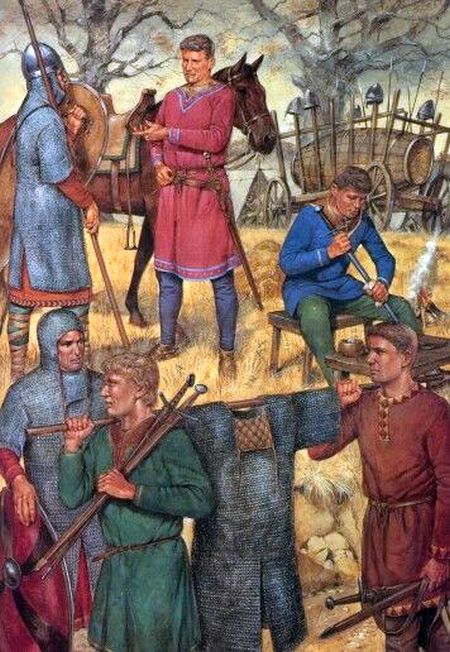
The results have shown that the Norman invasion force probably didn’t number more than 10,000 men, among which around one-fourth were possibly non-combatants, like sailors, cooks, traders, and baggage carriers.
In essence, at the Battle of Hastings, the Normans probably brought forth 7,500 troops – comprising 2,000 horsemen, 4,000 infantrymen (including some heavy infantry wearing the loricatos mail), and around 1,500 missile troops (including archers, crossbowmen, and slingers).
The Anglo-Saxon Cavalry Confusion
Coming to the Anglo-Saxon side, much has been said of the (probable) absence of English cavalry at the Battle of Hastings. And the credible reason for such a hypothesis hinges on two factors. The first factor intrinsically relates to the battlefield itself and how the English forces arrayed themselves defensively on the ridge. Having cavalry at his disposal probably wouldn’t have mattered much for Harold Godwinson, since his forces had already occupied the higher ground during the encounter.
The second, and arguably more important, factor relates to the Anglo-Saxon mode of warfare in medieval times. To that end, from the perspective of military history, Anglo-Saxons were not really known for their dedicated shock cavalry (although some of the high-ranking huscarls possibly arrived at the battlefields on horseback), given their derivation of influence from the east Germanic warbands of the late Roman era.
On the other hand, Normans continued the legacy of both the Roman equites and Frankish scarae, thus showcasing the influence of continental France in the early feudal age. In essence, the Normans were well suited to the rigors and training of horsemanship and cavalry-based tactics, fueled by their penchant for adaptability, as opposed to the ‘secluded’ Anglo-Saxons of the British Isles who continued the military traditions of their forefathers and the Scandinavians.
The Axe Effect and Numbers on the English Side
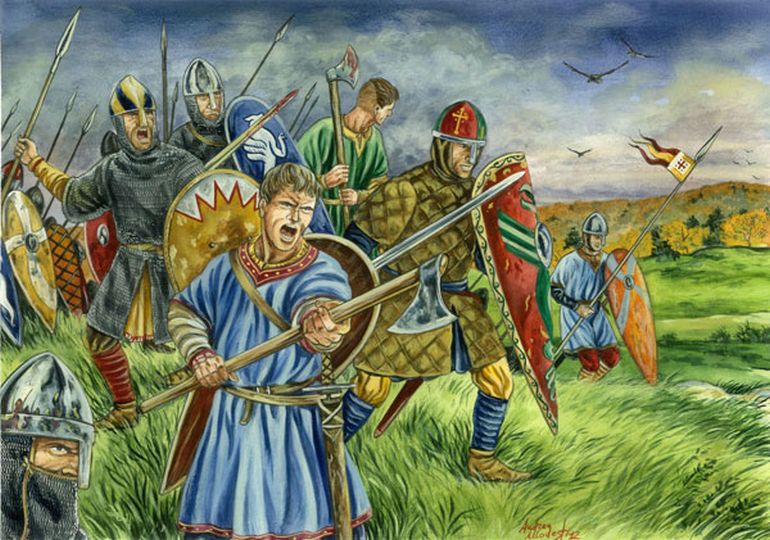
Much like the presumed difference in cavalry fielded by the two opposing forces at the Battle of Hastings, historians have also put forth their hypothesis regarding the primary weapons used by the elite forces of the Anglo-Saxons and the Normans.
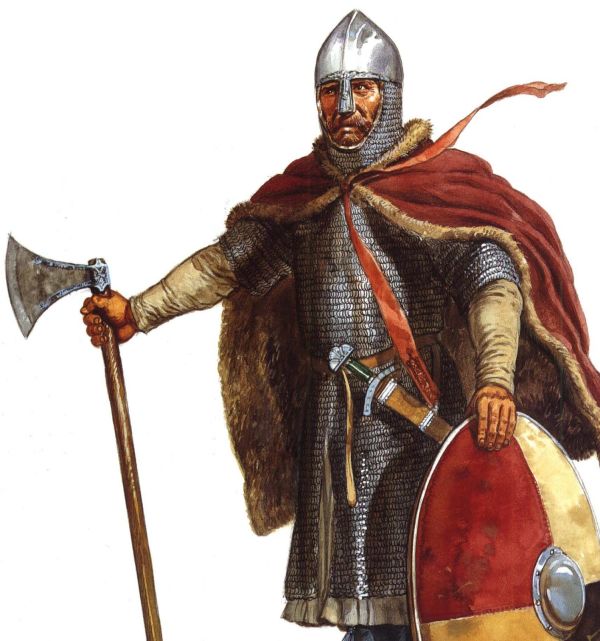
To that end, as opposed to the medieval status of the sword, the royal hearthweru (or heath-guard) and huscarl (derived from Old Norse húskarlar) warriors on the English side preferred their axes – possibly of the heavy kind, known as the broadaxe.
The imposing weapon, used by two hands, had a cutting edge of more than 10 inches while being supported by a hard shaft. Many of the fyrd (conscripted) soldiers also used the lighter Danish ax as a single-hand-wielded melee weapon, with its cutting edge of around 3 inches.
As for the numbers on the English side, Harold might have just had a slight advantage over his Norman adversary with around 8,000 men. Among them, around 800-1000 men comprised the royal hearthweru troops of the king and his brothers. These elite household troops were supported by around 6,500 men of the fyrd and a small number of militias from Sussex and Kent.
Now once again reverting to the size of the battlefield, the ridge and its surroundings would have actually made the space cramped for the English forces. Furthermore, it should be also noted that many of the Anglo-Saxon warriors marched 241 miles (386 km) to intercept William, and that too after dealing with a massive army fielded by the ‘last great Viking’ Harald Hardrada only 19 days before the Battle of Hastings.
The Tactics Involved in the Battle of Hastings
The Failed Volley of the Normans
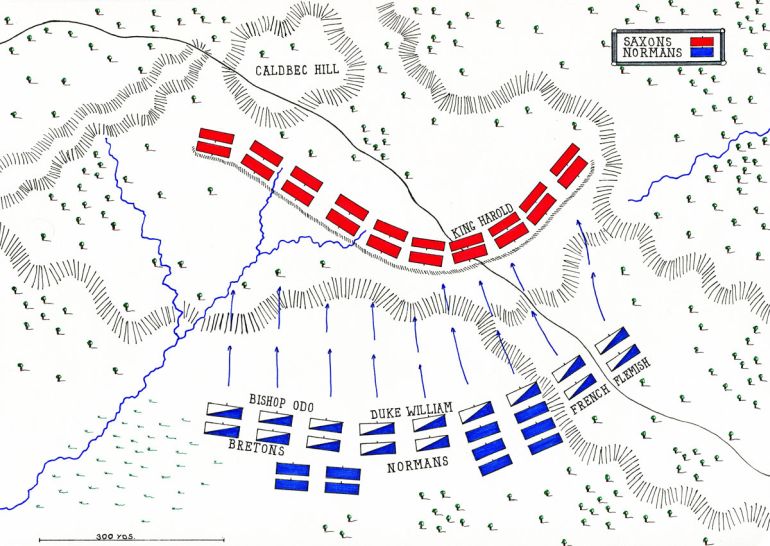
Coming to the very scope of the battle itself, the encounter possibly began at 9 am in the morning with a blaring of trumpets. And given the better defensive position of the English forces atop the ridge (around 730 m or 2,400 ft in length), protected on the flanks by woods and at the front by marshes, the initial Norman plan was to ‘soften’ up the opposition with projectiles.
But unfortunately for the Duke of Normandy, the very gradient of the slope made the trajectory of the arrows quite harmless for the forces concentrated on the ridge, with most arrows probably passing over the heads of the (possibly) adopted shield wall – and few only hitting the latecomers to the English party on the rear.
On the other hand, the Anglo-Saxons had very few archers among their ranks, which in turn would have made it difficult for the Normans to re-use the fired enemy projectile. In essence, the preliminary archery volley was more or less a failed tactic on the part of the Normans, which interestingly led to some bold maneuvers initiated by their commanders to turn the tide of the ‘disadvantaged’ battle.
The Ridge Defense of the Anglo-Saxons
Thus came forth the crucial part of the Battle of Hastings when Duke William desperately sought to change the balance of the encounter. As a result, he ordered his infantry to move forward and clash with the enemy through the inconvenient slope. The English buoyed by their elevated position on the battlefield greeted the approaching Normans with javelins, arrows, sling bullets, and possibly even throwing axes (of the smaller variety).
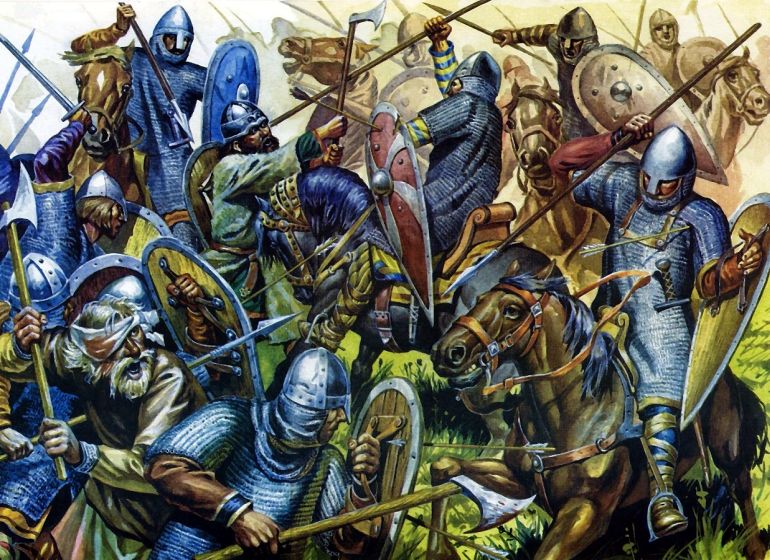
To their credit, in spite of considerable losses, the still-fazed Norman infantrymen managed to finally close in with their foes. But the closed-packed columns of the English shield wall didn’t buckle under the already tired onslaught – so much so that the Duke was forced to call upon his cavalry forces to support their allies.
But the seemingly determined cavalry charge (a well-known tactic espoused by the Normans) came to naught, once again partly slowed down by the slope, and rather afflicted by various types of projectiles discharged from the English positions.
And while the Norman knights tried their best to wheel around and continue with their disparate charges, the Anglo-Saxon lines held together with the front-line troops deftly welding their axes to mitigate the Norman impact.
So after being under pressure for nearly two hours, with injuries, fatalities, and fatigue, the left wing of the Normans, mainly comprising the Bretons and auxiliaries, finally wavered. The anxious center affected by their flank also pulled back due to the combined effects of panic and self-preservation.
And if the chaotic scene was not adverse enough for the Normans, a rumor began to spread that their Duke was killed in the battle. Consequently, the Anglo-Saxon right wing pushed forth and began to pursue the routing Bretons, while even managing to catch up with some of the enemy horsemen who were left floundering in the marshy grounds.
The ‘Resurrection’ of William
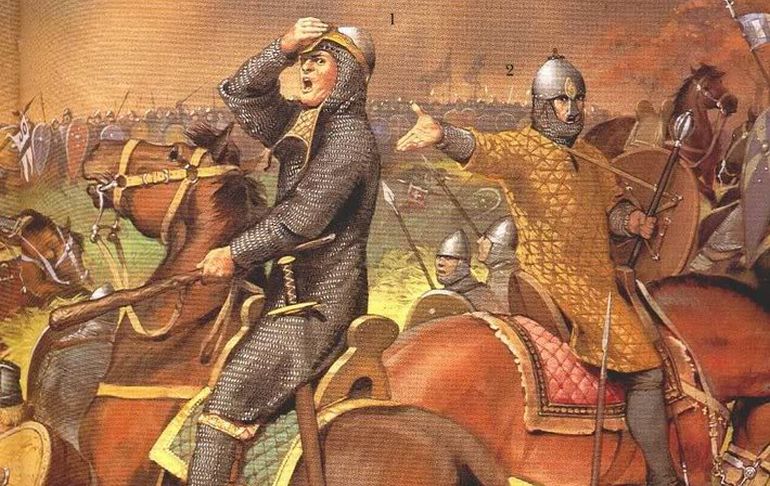
However, as with many of the momentous encounters recorded in the annals of history, it was ironically this chaotic scene that offered Duke William the opportunity to strike back at his foes. But first, he had to prove his own existence in front of his troops – a job done with aplomb when William rode through the ranks of the invasion force with his helmet pushed back.
According to the Bayeux Tapestry, Count Eustace of Boulogne (also known as Eustace aux Gernons) helped the Duke in his ‘resurrection’ efforts by pointing towards him with a papal banner. And meanwhile, William roared about the desperate Norman position with the inescapable sea to their back, and thus rather made a grandiose presentation of himself – which would have surely raised the morale of many of the proximate Norman troops.
The ardent words were soon followed by action, with the Duke leading his chosen company of horsemen to dash into the English forces who had come down to pursue the Bretons. These unarmored men were most likely cut down by the swift cavalry of the Normans, in spite of a ‘mini’ last stand made by some of the detached Anglo-Saxons by the slope.
Now intriguingly enough, historians are still not sure of the nature of the pursuance conducted by the English from their right flank. Some have hypothesized that it was an impetuous action, which might have even resulted in the deaths of Harold’s brothers Gyrth and Leofwine – (possibly) due to William’s timely counter in the form of a cavalry maneuver.
Others have conjectured that the advance of the English down the slope was possibly an organized counter-attack to score a crippling blow on the Normans, in a bid to decide the battle outcome.
The Decisive Turnaround
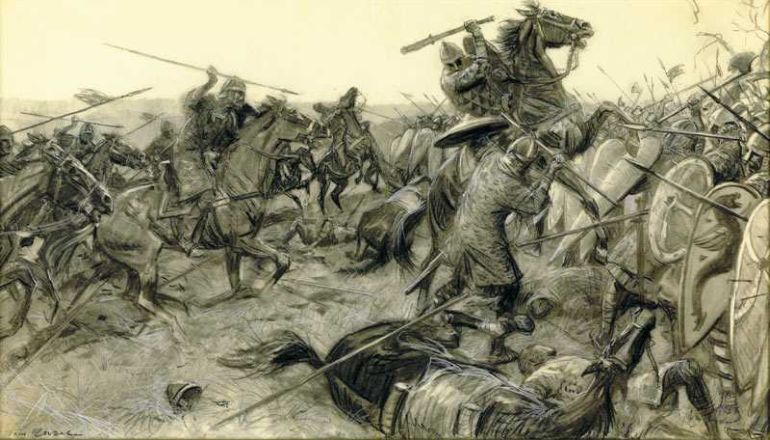
In any case, the Duke’s charge gave the much-needed breather to the Normans, while the English forces also stalled their activities to assess the damage on their right flank – and thus both armies rested for a while from the rigors of the encounter. After some time, the Normans once again pushed forth against the slope with their mixed infantrymen and cavalry – and the result panned out in a similar fashion with the English stubbornly holding their ranks.
But this time around, the Duke devised the ‘continental’ Norman tactic of feigned retreats, rather encouraged by the presumed levels of Anglo-Saxon impulsiveness. Probably inspired by the 9th-century Bretons, the Norman formations entailing smaller groups of horsemen (conrois) were suited to such flexible ruses.
In essence, the feigned flight was made to lure out the enemy soldiers, which in effect disturbed the opposing tight formations of heavy infantry (or knights), thus providing the initiative to strike from the Norman side.
Suffice it to say, these maneuvers, though requiring high levels of skill and precision on the part of the horsemen, were actually successful in eliminating many of the restive fyrd members along with even some hurcarls and thegns.
But while the Norman resourcefulness resulted in the thinning of the English lines, William still couldn’t gain a foothold on the ridge, with rear-guard Anglo-Saxons taking up the formerly defensive positions of their ‘lured’ comrades.
At the same time, the Norman cavalry forces were dwindling in numbers, with many of the horses being killed or crippled, which forced some knights to fight on foot (even William had three horses killed under him, according to William of Poitiers). The dreadful situation was rather exacerbated by the fallen bodies of men and horses strewn across the slope – that hauntingly acted as obstacles to the Norman advance.
Do or Die
In essence, in spite of the recent reversals, the English still held on to their elevated positions, albeit in thinner lines. The Normans, on the other hand, knew that their cause was lost if the Anglo-Saxons were successful in defending their positions till sunset.
Thus William took the last gamble and let loose all his forces onto the English lines. Intriguingly enough, the Bayeux Tapestry depicts this part of the Battle of Hastings with Norman archers and their larger quivers – possibly to emphasize the availability of a fresh supply of arrows to the invading force.
Now while the historicity of events is a bit vague in regard to this phase of the battle, it can be hypothesized that the archers played a bigger role than before, especially since the English lines were already battered by repeated Norman advances and feigned retreats.
And since the gap between the two armies was already beginning to close, it may have been the case that the crossbowmen took advantage of the short-range required to further maul the English troops.
As for the conventional archers, most of their shafts would have still fallen into the rear ranks of Harold’s forces, thus avoiding their own allied soldiers while successfully pelting the English from upper angles. At the same time, the now-frantic Norman infantry and cavalry troops (by this time merging into ‘mixed’ groups) continued to push their adversaries on the ridge.
The Death of the English King
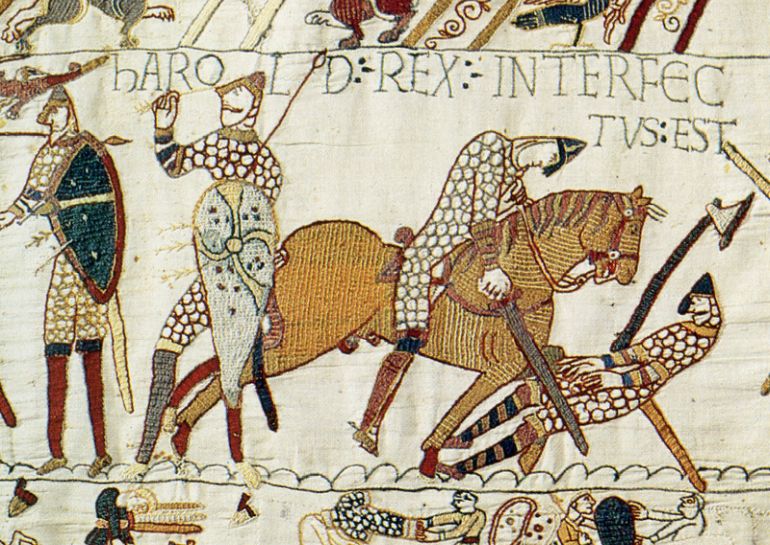
It was then that the English king met his inglorious demise, apparently when one of those arrows struck him through his eye (or above his eye). And while near-contemporary sources oddly remain rather vague on this momentous episode, the Tapestry depicts a Norman knight who may have injured the already prostate English king with his sword in a ‘cowardly’ manner. Unfortunately, modern historians are still not sure of the exact cause of the English king’s death – with theories ranging from literal representations to symbolic depictions of blinding.
But one thing the scholars are sure of is that the death of Harold Godwinson marked the acute erosion of the English resistance, with many members of the fyrd undoubtedly taking to flight on hearing news of the demise of their ruler, thus mirroring the Norman situation of the earlier hours.
Many of these soldiers probably wanted to hide in the forested regions in proximity to the battlefield. The overall effect of this partial routing led to the shrinkage of the English flanks, which finally allowed the Normans to get their coveted foothold on the crest of the ridge (possibly from the western side).
It should be noted however that most of the remaining few Anglo-Saxon hearthweru warriors must have gathered around the fallen body of their king to make their last stand. But unfortunately for the English, with the passage of time, turmoil already gripped the morale of the bulk of the army. Many of the other troops (including some higher-ranking soldiers) tried to make their escape into the nearby wooded areas, especially near Caldbec Hill.
Contemporary sources also make mention of the Malfosse incident, which entailed a large group of Englishmen making their desperate stand by an old rampart north of the battlefield. Intriguingly enough, most of the accounts of this incident vary, which suggests that the defense was possibly either made by latecomers or by desperate survivors of the battle. In any case, this last pocket of defense was finally wiped out by William, and thus the Normans won the Battle of Hastings.
Honorable Mention – The Fall
While not pertaining to the battle itself, it is mentioned by 12th-century historian William of Malmesbury (and also Robert Wace) that Duke William fell as he stepped on the shores of England at the head of the invasion (by the Pevensey Bay). But instead of ‘deducing’ it as a bad omen, a nearby knight humorously interpreted the incident, by saying how William already had the earth of England in his hands.
Consequently, in a usually resourceful Norman manner, the army went on to reinforce the existing Roman fortifications (comprising a stone fort known as Anderida) – though William finally decided to leave this area, and made his way to Hastings along the coast.
Visual Reconstruction of the Battle of Hastings
The incredible political scope leading up to the battle, the encounter itself, and its aftermath on Britain – all of these ‘parcels’ of history are explained in a nifty manner by Francis Glenday in his short and simple animated video titled “A Young Person’s Guide to the Battle of Hastings” –
And in case you are interested in a more detailed visual representation of the battle itself, the YouTube channel BazBattles has provided an insightful overview of the tactical scope of the momentous encounter in circa 1066 AD –
Featured Image: Illustration by Jason Askew
Sources: BBC / BritishBattles / Telegraph
Book References: Hastings 1066: The Fall of Saxon England (by Christopher Gravett) / The Battle of Hastings: The Fall of Anglo-Saxon England (by Harriet Harvey Wood)
And in case we have not attributed or misattributed any image, artwork, or photograph, we apologize in advance. Please let us know via the ‘Contact Us’ link, provided both above the top bar and at the bottom bar of the page.


Be the first to comment on "Battle of Hastings, 1066 AD: The Armies and Tactics of Normans and Anglo-Saxons"